Trading cryptocurrency with leverage has become more and more popular for traders who want to make the most of their potential profits. However, it’s a risky strategy that can lead to either big wins or major losses.
Before jumping into leverage trading, it’s important to fully understand what crypto leverage trading means, the process involved in it and the crypto exchange platform you can start using right now.
Getting Started with Bybit:
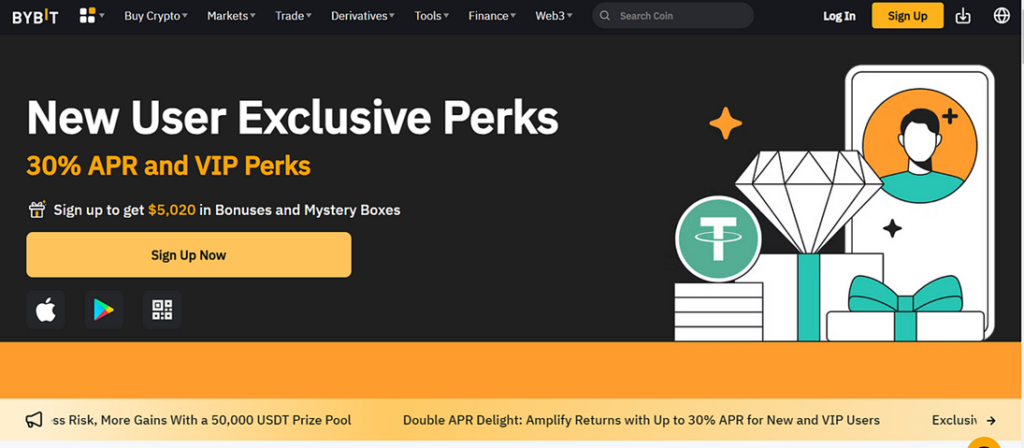
One reputable platform for executing leveraged trades is Bybit. In this comprehensive guide, we will walk you through the steps of placing your first crypto leverage trade on Bybit. Our guide covers everything from creating a secure account to managing risk and closing your transactions.
Whether you are a novice or an experienced trader looking to explore leverage trading, this guide provides you with the knowledge and tools you need to get started safely and confidently.
Check out this article: Bybit Review In 2023: Pros, Cons, New Products, and Warnings!
1) Creating a Secure Account
To begin your journey on Bybit, you’ll need to register for an account. However, this isn’t just about entering your email and a password; it’s about ensuring the security of your assets.
When creating your Bybit account, follow these steps:
Navigate to the signup page:
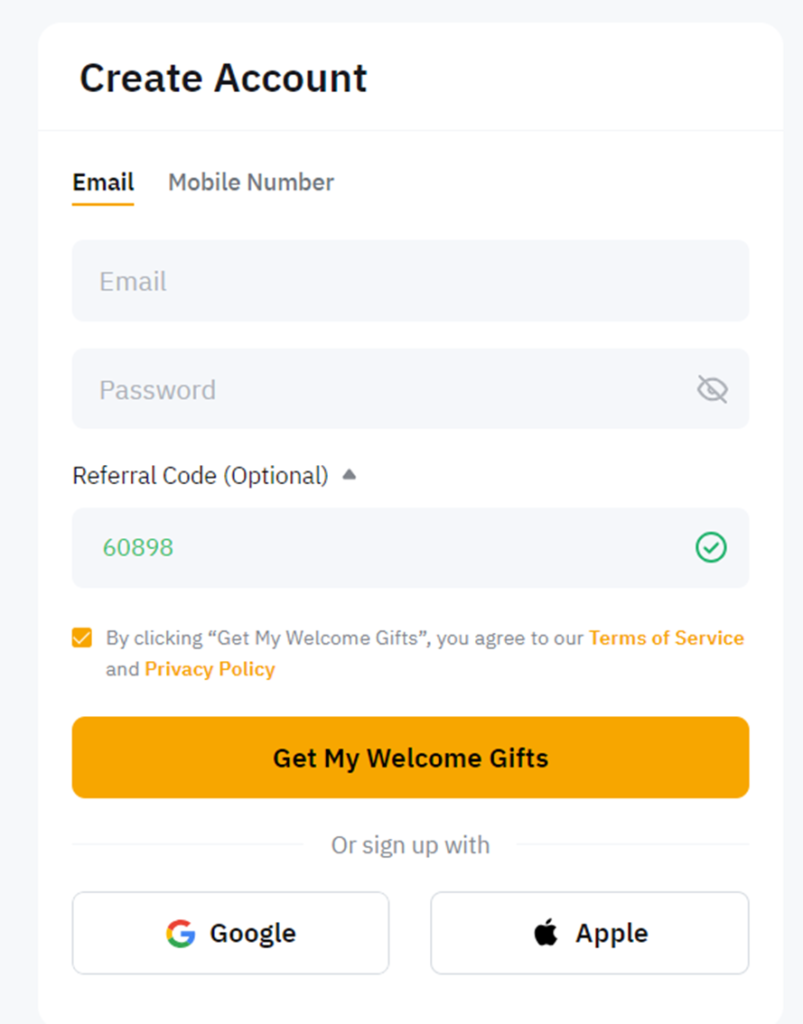
There are various means of accessing the sign-in functionality on Bybit, each of which is visually illustrated in the accompanying image.
Users can select to utilize their email address, mobile phone number, and Google, or Apple accounts. Regardless of the method of authentication chosen, the ultimate goal is to create an account.
For this guide, we will be employing email credentials to log in.
- Use an Email You Have Access To: Ensure that you provide an email address that you have access to. Bybit will require you to verify the ownership of the email address provided.
- Use a Strong Password: Your password should be a unique combination of letters, numbers, and special characters. Avoid easily guessable phrases or words.
Upon selecting either the sign-in or “Get My Welcome Gift” button, an additional window will appear requiring you to verify that you are not a robot. To proceed, you will be prompted to complete a task within this window.
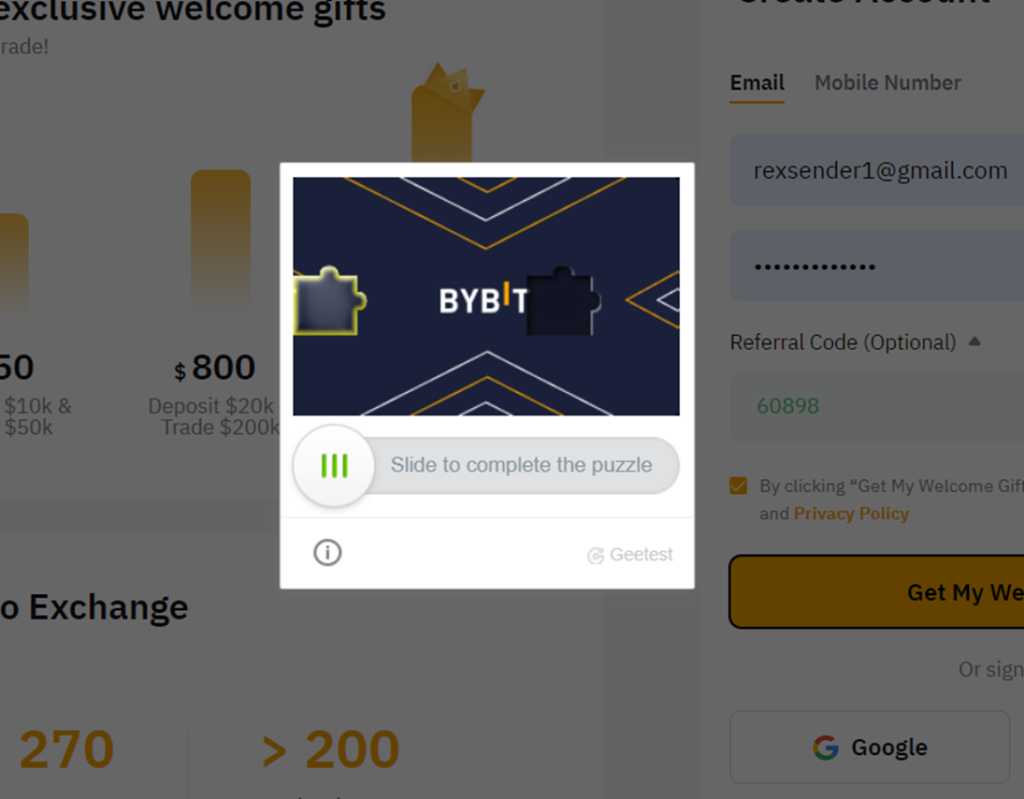
As shown above, you have to slide the puzzle to prove you’re not a robot.
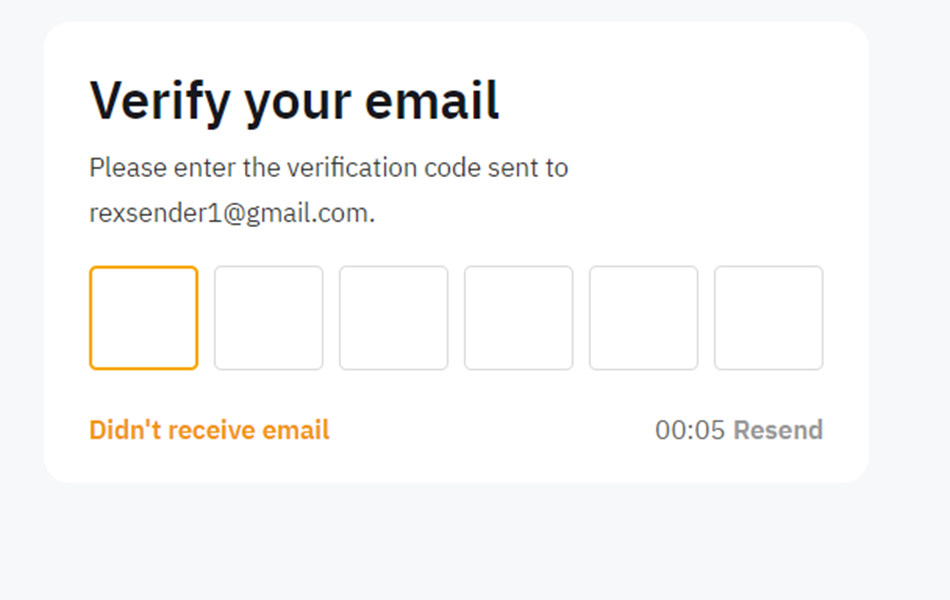
To proceed with the process, kindly check your email registered with Bybit. You will receive a 6-digit code that needs to be input into the designated box. This step is crucial to verifying that you are the owner of the email.
Once you input the correct code, you will be directed to your dashboard as a confirmation that your account has successfully been opened.
2) Navigating Your New Bybit Account
Once you get directed to your Bybit dash board, the next step is to make sure your account is secured and verified.
- Two-Factor Authentication (2FA): For enhanced security of your account, it is recommended to activate Two-Factor Authentication (2FA). This will add an extra layer of protection to your account. You can easily set it up by using a mobile app, such as Google Authenticator.
- Identity Verification (KYC): Bybit prioritizes the security of users by strictly adhering to the Know Your Customer (KYC) regulations. To begin this process, you will need to navigate to the Account section by logging into your Bybit account. Once there, Bybit will guide you through the necessary steps for KYC compliance, which include providing identification documents such as a government-issued ID or passport. Rest assured that your personal information is being handled with the utmost care and confidentiality to ensure a safe and secure trading experience.
3) Depositing Funds
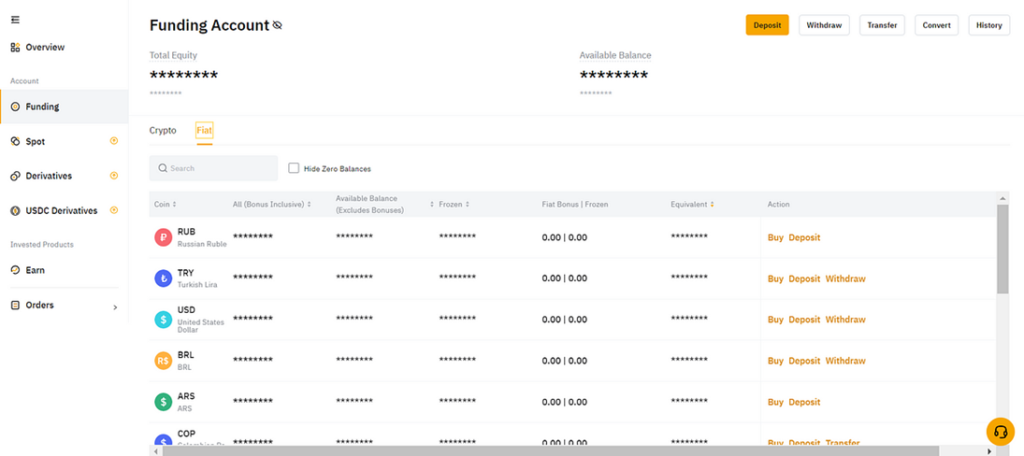
Once your account is set up and verified, you’ll want to fund it. Here’s how:
- Accessing the Wallet Section: Log in and click the Assets section, click Funding Account, and select which method you want to use to deposit.
Bybit supports various cryptocurrencies. To make a deposit:
- Choose the Cryptocurrency: Select the cryptocurrency you want to deposit.
- Generate a Deposit Address: Bybit will provide you with a deposit address. Ensure you send your chosen cryptocurrency to this address from your wallet.
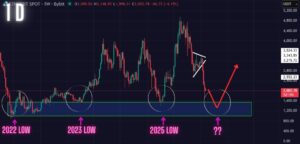
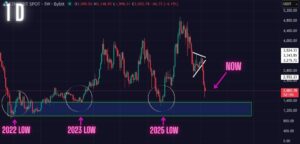
Understanding Leverage
What is leverage?
Leverage involves utilizing borrowed funds to trade various financial assets, such as cryptocurrencies. It increases your capacity to buy or sell, allowing you to operate with a larger capital size than what you possess in your wallet.
Depending on the specific crypto exchange, you may have the option to borrow up to 100 times your account balance.
Optimal Leverage Selection
Choosing the right leverage level is crucial. Factors to consider include:
- Risk Tolerance: Determine how much risk you’re comfortable with. Higher leverage means higher potential profits but also higher potential losses.
- Market Conditions: Assess the current market conditions. In volatile markets, lower leverage may be more prudent.
- Experience Level: For beginners, starting with lower leverage levels, such as 1x to 5x, is recommended to mitigate risk.
Check out this article: A Beginners Guide to Crypto Leverage Trading
Placing Your First Leverage Trade

You can use either real money or the demo trading feature provided by Bybit to get used to the platform and trading, as cryptocurrency is highly volatile.
To initiate trading and experiment on the demo account, simply hover over the profile icon. This action will trigger the appearance of a modal window, where you can then proceed by selecting Demo Trading.
Navigating to the Trading Interface
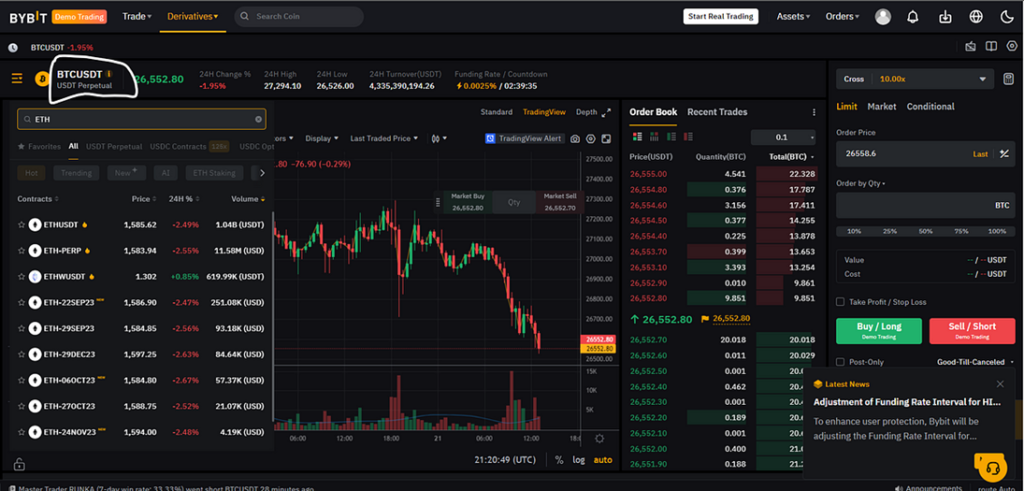
As a beginner, executing your first leveraged trade on Bybit might be complex seeing this interface, but we would break it down for you.
Selecting a Trading Pair:
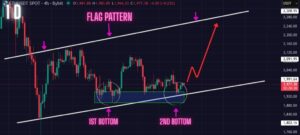
Choosing the right trading pair is essential. It represents the assets you’re trading. For instance, BTC/USDT represents Bitcoin against the US dollar. It is essential to select a pair that you’re familiar with or have researched extensively.
Setting Up the Trade:
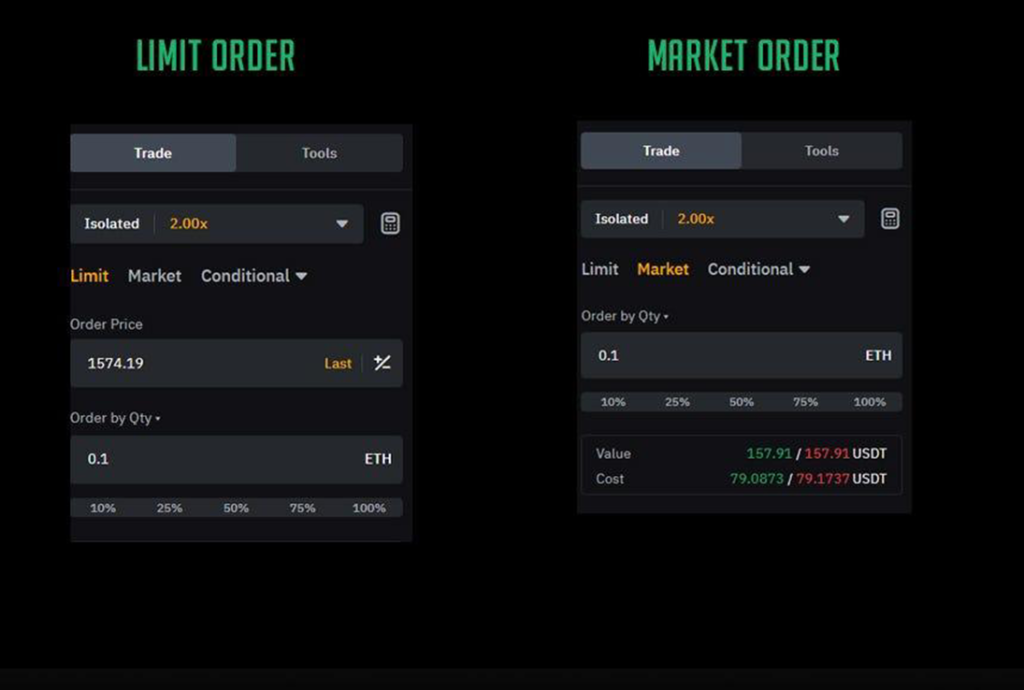
It is crucial to understand the difference between a market order and a limit order. A market order is executed at the current market price, while a limit order is executed when the price reaches a specific level.
To break it down into simple terms, we would use Ethereum/US Dollar Tether to illustrate limit buy and sell orders:
Limit Buy Order (Buying Below Current Price):
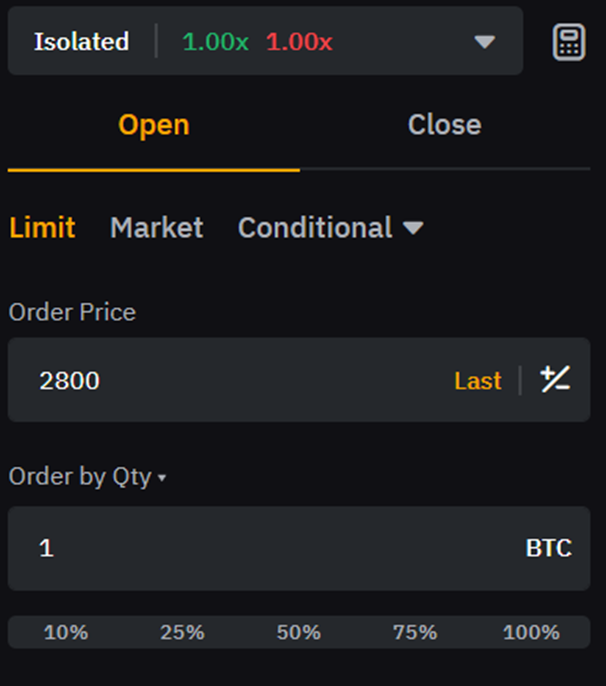
Suppose the current market price of Ethereum (ETH) is $3,000 USDT. You believe that if the price drops to $2,800 USDT, it would be a good opportunity to buy. You can place a limit on your order like this:
Limit Buy Order Details:
Trading Pair: ETH/USDT
Order Type: Limit Buy
Price: $2,800 USDT
Quantity: 1 ETH
This means you’re placing an order to buy 1 ETH at a maximum price of $2,800 USDT per ETH.
Limit Sell Order (selling above the current price):
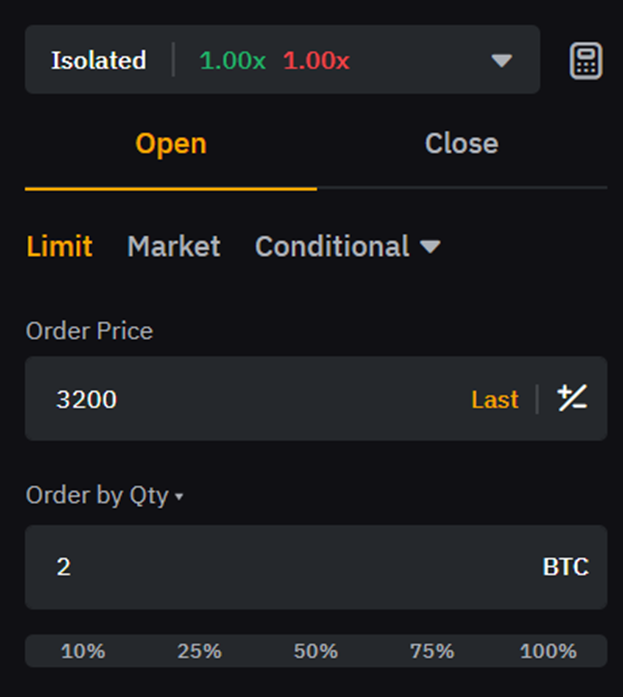
Suppose you own 1ETH, and you believe that if the price reaches $3,200 USDT, it would be a good opportunity to sell for a profit. You can place a limit-sell order like this:
Limit Sell Order Details:
Trading Pair: ETH/USDT
Order Type: Limit Sell
Price: $3,200 USDT
Quantity: 2 ETH
This means you’re placing an order to sell 2 ETH at a minimum price of $3,200 USDT per ETH.
Remember, the examples given are purely for illustration and aren’t based on real market conditions.
It highlights the importance of thorough research and analysis due to the ever-changing nature of the market.
Setting Leverage:
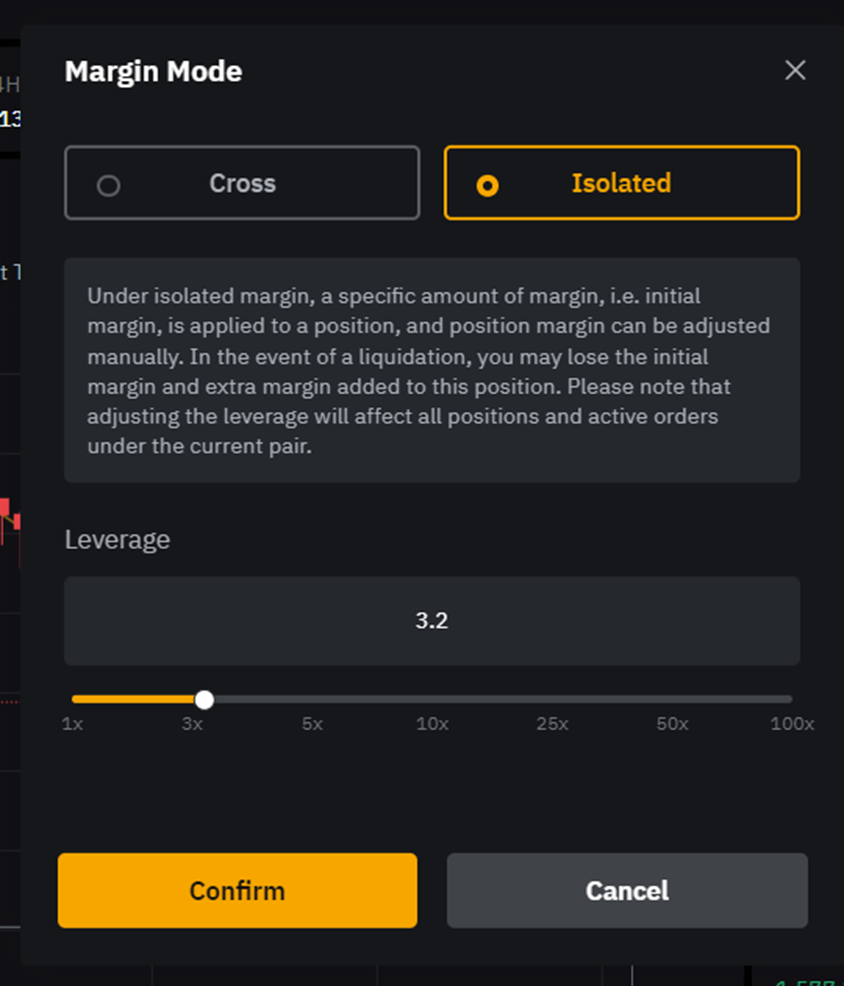
Isolated leverage is recommended as it limits potential losses to a specific position, reducing overall risk. Cross-leverage, while potentially more profitable, involves a higher risk of liquidation.
Starting with isolated leverage helps novices learn and manage risk effectively.
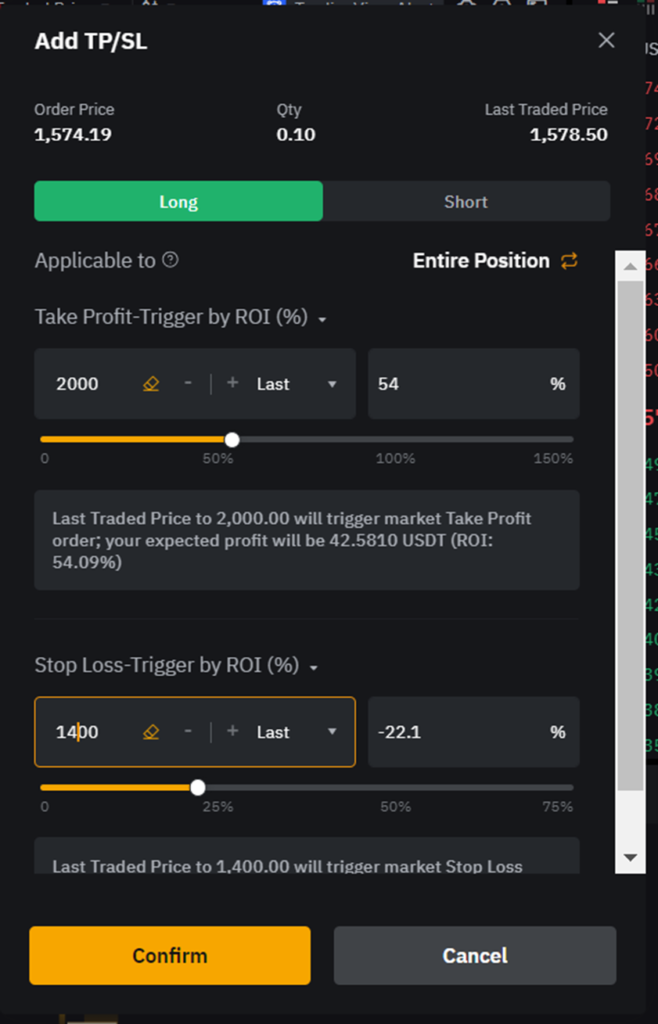
Stop-Loss and Take-Profit:
Implement stop-loss and take-profit levels to manage risk and secure profits.
1. Limit buy orders, stop losses, and take profit.
Suppose you’re placing a limit buy order for 1 ETH for $2,800 USDT with the following risk management:
Take-Profit (TP) Level: $3,200 USDT
This means that if the price of Ethereum reaches $3,200 USDT, your order will automatically sell for a profit.
Stop-Loss (SL) Level: $2,600 USDT
If the price drops to $2,600 USDT, your order will automatically sell to limit potential losses.
Limit Buy Order Details:
Trading Pair: ETH/USDT
Order Type: Limit Buy
Price: $2,800 USDT
Quantity: 1 ETH
Total Cost: $2,800 USDT
Take-Profit (TP): $3,200 USDT
Stop-Loss (SL): $2,600 USDT
2. Limit Sell Order, stop losses, and take profit. (Selling Above Current Price):
Now, for the limit sell order to sell 2 ETH at $3,200 USDT each:
Take-Profit (TP) Level: $2,000 USDT
If the price of Ethereum reaches $2,000 USD, your order will be closed in profits.
Stop-Loss (SL) Level: $3,900 USDT
If the price reaches $3,900 USDT, your order will automatically closed in a loss.
Limit Sell Order Details:
Trading Pair: ETH/USDT
Order Type: Limit Sell
Price: $3,200 USDT
Quantity: 2 ETH
Total Earnings: $6,400 USDT
Take-Profit (TP): $3,600 USDT
Stop-Loss (SL): $3,000 USDT
By setting TP and SL levels, you’re implementing risk management strategies to protect your investments. These levels help automate the selling process, ensuring you can secure profits and limit potential losses based on predefined price thresholds.
Always remember that market conditions can change rapidly, so adjusting these levels as needed is important.
Managing Your Position
Monitoring Open Positions: Regularly check your open positions to stay informed about their performance at the bottom of the page.

Closing Your Trade: Knowing when to exit a trade is vital. Consider factors such as:
- Price Movements: Pay attention to how the price is behaving relative to your entry point.
- News and Events: Stay informed about relevant news events that could impact your trade.
To close a position on Bybit:

Go to the Positions tab at the bottom of the Bybit page & locate your open position and click Market Close or Limit Close to execute the exit.
Adjusting Stop-Loss and Take-Profit:

You can also adjust your stop-loss or take-profit levels if needed by clicking the tp/sl section and adjusting it according to your trading strategy.
Risk Management Tips
- Realistic Expectations
- Utilizing Stop-Loss Orders
- Diversification Strategies
Conclusion:
Executing your first crypto leverage trade on Bybit is an exciting venture that requires careful planning, knowledge, and risk management. We’ve covered the essential steps, from creating a secure account to understanding leverage and executing trades. Remember that success in leveraged trading comes with practice and experience.
It’s crucial to approach it with prudence, a well-defined strategy, and a commitment to continuous learning.